


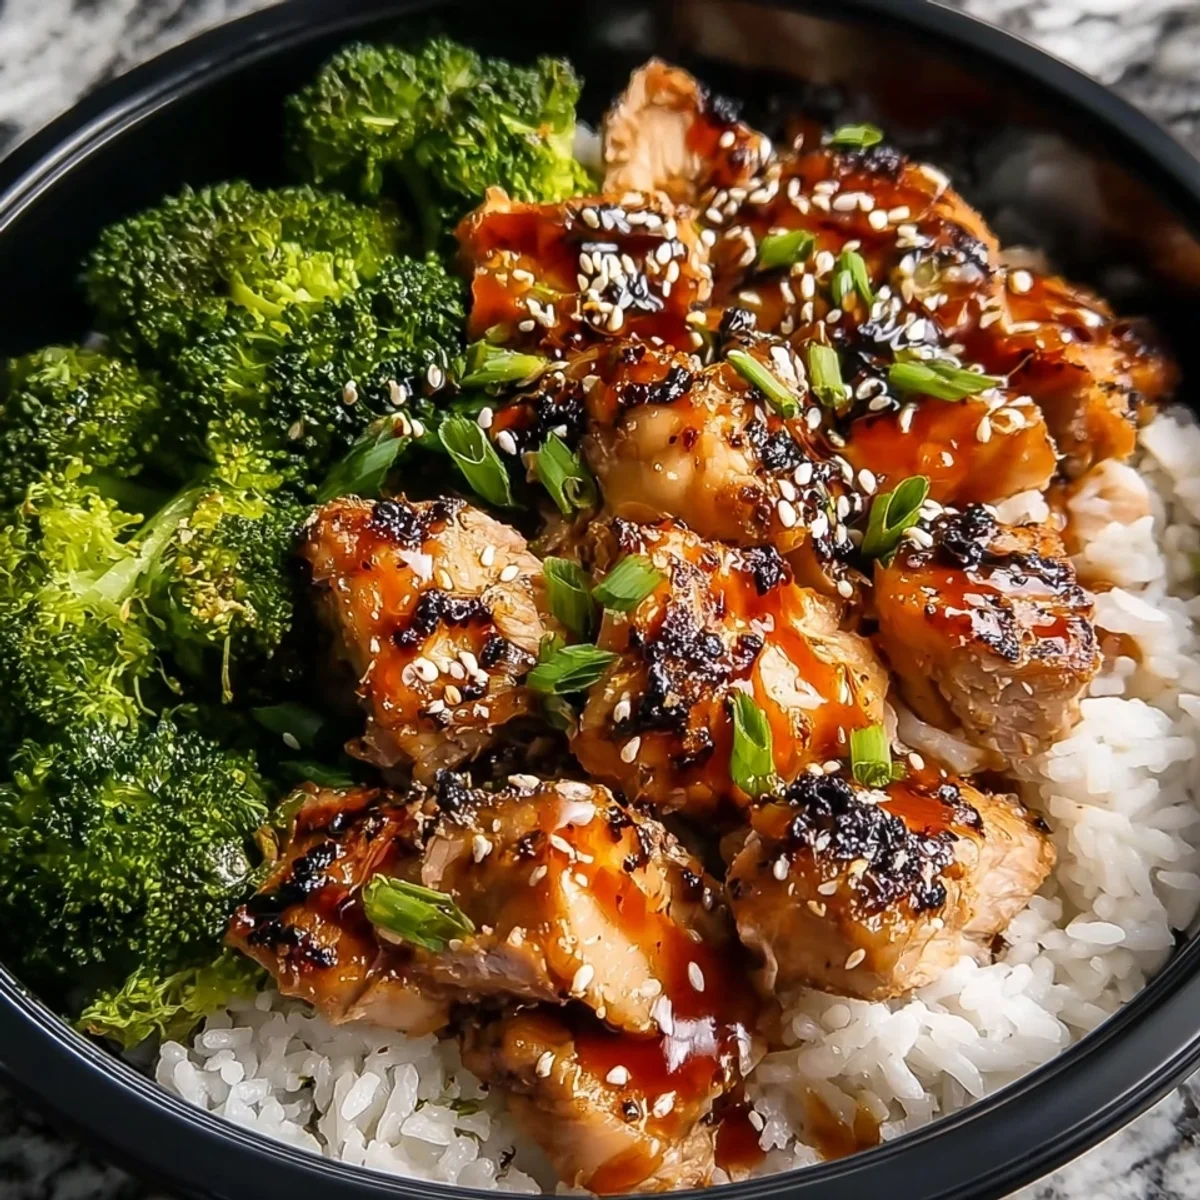
Sticky chicken rice bowls packed with high-protein chicken, fluffy rice, and a savory-sweet glaze. Easy meal prep for the whole week.
Okay, so real talk I stumbled onto this recipe during a chaotic Sunday meal prep session when I had chicken thighs, a bottle of soy sauce, and absolutely zero plan. I threw things together, crossed my fingers, and honestly? I didn't expect that first bite to hit so hard. These sticky chicken rice bowls have been on my weekly rotation ever since. They're saucy, savory, a little sweet, and they make my whole kitchen smell incredible.
Oops so the first time I made the glaze, I walked away to answer a text and came back to what I can only describe as sticky chicken candy. Like, the sauce had reduced so far it was basically toffee. I had to chisel it off my pan. Lesson learned: stay close, stir often, and maybe put your phone in another room. Your chicken will thank you.
Sticky Chicken Rice Bowls: Ingredients You'll Need
- 2 cups jasmine rice, rinsed: Rinsing is non-negotiable I skipped it once and ended up with a gummy, clumped-together mess that I was too embarrassed to photograph. Jasmine rice has this beautiful floral aroma that makes the base of these sticky chicken rice bowls feel really special. The rinse removes excess starch so every grain stays separate and fluffy. It takes thirty seconds and makes a genuinely noticeable difference. Don't skip it, please, I'm begging you.
- 2 and 3/4 cups low-sodium chicken broth: Cooking the rice in chicken broth instead of water is one of those small moves that completely transforms the dish. It adds this subtle savory depth to every single bite, even before the glaze hits. I always go low-sodium here because the soy sauce brings plenty of salt later, and I've made the mistake of using regular broth once way too salty. Low-sodium gives you control, and in cooking, control is everything.
- 1 tsp sesame oil: A tiny drizzle of sesame oil stirred into the rice right after cooking is my little secret weapon. It adds this warm, nutty, toasty note that ties the whole bowl together. Honestly, it smells so good it'll make your neighbors suspicious. Don't cook with it the heat kills the flavor. Just stir it in at the end and let it do its quiet, fragrant magic.
- 2 lbs boneless, skinless chicken thighs: Thighs over breasts, every single time I will die on this hill. chicken thighs stay juicy and tender even when you sear them hard, and they hold up beautifully in the sticky glaze without drying out. They're also more forgiving if you accidentally cook them a minute too long, which, let's be honest, happens to all of us. For sticky chicken rice bowls specifically, the fat content in thighs helps the glaze cling in the most gorgeous way.
- 1/3 cup low-sodium soy sauce: Soy sauce is the salty, umami backbone of the entire glaze. Low-sodium is key here regular soy sauce will make the whole thing taste like a salt lick, and I learned that the hard way after one very puffy-faced Tuesday. It gives the sauce that deep, savory color and flavor that makes people ask what your secret is. Spoiler: it's just good soy sauce and a little patience.
- 3 tbsp honey: Honey is what takes this glaze from good to absolutely craveable. It caramelizes beautifully in the pan, creating that glossy, sticky coating that makes these bowls so satisfying to eat. I've tried maple syrup as a swap and it works, but honey has this floral sweetness that just feels right here. Don't reduce it three tablespoons is the sweet spot between savory and sweet without tipping into dessert territory.
How to Make Sticky Chicken Rice Bowls Step by Step
- Step 1: Cook the Rice:
- Start by combining your rinsed jasmine rice, chicken broth, sesame oil, and salt in a medium saucepan. Bring it to a boil, then drop the heat to low, cover, and let it do its thing for about 15 minutes. Resist the urge to lift the lid I know it's tempting, but the steam is what makes the rice fluffy. When it's done, take it off the heat and let it sit covered for another five minutes. That rest period is everything. The rice that goes into your sticky chicken rice bowls should be perfectly cooked, not mushy.
- Step 2: Season the Chicken:
- Pat your chicken thighs dry and I mean really dry, like press those paper towels in there. Moisture is the enemy of a good sear, and a good sear is what gives these sticky chicken rice bowls that gorgeous golden color. Drizzle the avocado oil over the chicken, then sprinkle on the garlic powder and black pepper. Rub it all in with your hands. Yes, it gets messy. Yes, it's worth it. Season both sides generously and let the chicken sit for a few minutes while your pan heats up.
- Step 3: Sear Chicken Golden:
- Get your skillet screaming hot before the chicken goes in medium-high heat, no shortcuts. When the thighs hit the pan, you want that immediate, aggressive sizzle that sounds like applause. Don't move them! I used to poke and prod my chicken constantly, and it always stuck or tore. Let it sear undisturbed for about five to six minutes per side until it's deeply golden. That crust is flavor, and it's also what helps the glaze stick later. Pull the chicken out and set it aside it'll finish cooking in the sauce.
- Step 4: Build the Glaze:
- In the same pan with all those beautiful browned bits still in it, pour in your soy sauce and honey. Stir to combine and scrape up any stuck-on pieces from the bottom that's pure flavor right there, don't waste it. The mixture will start bubbling almost immediately and smell absolutely incredible. This is the moment where your kitchen starts smelling like a restaurant and your family magically appears asking what's for dinner. The glaze base for these sticky chicken rice bowls is simple but deeply satisfying to make.
- Step 5: Thicken the Sauce:
- Let the glaze simmer over medium heat for two to three minutes, stirring occasionally, until it thickens slightly and coats the back of a spoon. This is where you need to stay present walk away and you'll have caramel, stay too long and it'll be thin and watery. I didn't expect that the sauce could go from perfect to overdone so quickly the first few times I made this. Watch for it to turn glossy and slightly syrupy. That's your signal.
- Step 6: Glaze the Chicken:
- Nestle the seared chicken thighs back into the pan and spoon that gorgeous sauce over every inch of them. Turn the heat to medium-low and let everything cook together for another five to seven minutes, flipping and basting as you go. The chicken finishes cooking through, the glaze thickens further, and everything gets sticky and caramelized in the most satisfying way. This final step is what makes sticky chicken rice bowls so irresistible the chicken becomes lacquered, glossy, and deeply flavored all the way through.
There's something genuinely meditative about making this meal. The sizzle of chicken hitting a hot pan, the smell of honey and soy sauce caramelizing together, the steam rising off perfectly cooked jasmine rice it all just feels so satisfying. Honestly, even on the most exhausting weeknights, standing at that stove and building something this delicious from scratch feels like a small act of self-care.
Storage Tips for Sticky Chicken Rice Bowls
Store the chicken and rice separately if you can I learned this after a sad, soggy meal prep week where everything went into the same container and the rice absorbed all the sauce and turned into one giant clump. Not cute. Keep the chicken in an airtight container in the fridge for up to four days, and the rice in its own container for the same amount of time. Reheat the chicken in a skillet with a tiny splash of water or broth to loosen the glaze back up the microwave works in a pinch but the skillet keeps it from getting rubbery. These bowls also freeze well! Freeze the chicken and rice separately for up to two months. Thaw overnight in the fridge and reheat as usual.

Ingredient Substitutions for Sticky Chicken Rice Bowls
To be real, I've made this recipe with so many different swaps over the years. Chicken breasts work if that's what you have, but watch the cook time they dry out faster than thighs. Brown rice is a great fiber-packed swap for jasmine, just adjust your liquid and cooking time. Coconut aminos work beautifully in place of soy sauce if you're avoiding gluten or soy, and the flavor is slightly sweeter which I actually love. Maple syrup can replace honey in a pinch it gives a slightly earthier sweetness that's really nice. Avocado oil can be swapped for any neutral high-heat oil like grapeseed or vegetable. And if you're out of chicken broth, vegetable broth works just fine for the rice.
Serving Sticky Chicken Rice Bowls for Maximum Flavor
Honestly, the toppings are where you get to have fun. I always do sliced green onions, sesame seeds, and a drizzle of sriracha for heat. Shredded carrots, thinly sliced cucumber, or a handful of edamame add freshness and crunch that balance out the richness of the glaze. A soft-boiled egg on top makes it feel extra luxurious and adds even more protein. For a full spread, serve these bowls alongside a simple miso soup or a quick cucumber salad dressed with rice vinegar and a pinch of sugar. If you're hosting, set up a little topping bar and let everyone build their own bowl it's always a hit and makes the whole meal feel interactive and fun.
The Cultural Backstory of Sticky Chicken Rice Bowls
These sticky chicken rice bowls are inspired by the bold, balanced flavors found across East and Southeast Asian cooking particularly the sweet-savory glazed proteins that show up in Japanese teriyaki, Korean bulgogi, and Chinese char siu. The combination of soy sauce, honey, and sesame is a classic flavor profile that's been beloved across these cuisines for generations. My personal connection to it started at a tiny Japanese restaurant near my college apartment where I'd order teriyaki chicken rice bowls on a weekly basis. I was broke, it was affordable, and it was the most comforting thing I'd ever eaten. Years later, recreating that comfort in my own kitchen with my own tweaks feels like a little tribute to those simple, happy meals.
I really hope these sticky chicken rice bowls become a staple in your kitchen the way they have in mine. They're the kind of recipe that feels like a hug warm, satisfying, and always there when you need something reliable and delicious. If you make them, please drop a comment below and tell me how it went! I genuinely love hearing about your kitchen adventures, disasters included.

Frequently Asked Questions about Sticky Chicken Rice Bowls
- → Can I use chicken breasts instead of thighs?
You can! Breasts are leaner and cook faster, so keep a close eye on them usually about four to five minutes per side. They're a bit less forgiving than thighs and can dry out quickly, so don't walk away. The glaze still clings beautifully either way.
- → How do I keep the rice from getting mushy?
Rinse your rice really well before cooking that removes excess starch, which is the main culprit for mushy rice. Also, resist lifting the lid while it cooks! Let the steam do its work and give it that five-minute rest off the heat before fluffing with a fork.
- → Can I make sticky chicken rice bowls ahead of time?
These are literally made for meal prep! Cook everything, store the chicken and rice separately in airtight containers, and you've got four days of lunches sorted. The flavors actually deepen overnight, so day-two bowls are arguably even better than day-one. Reheat the chicken in a skillet for best results.
- → Is this recipe gluten-free?
As written, it's not regular soy sauce contains wheat. But it's an easy fix! Just swap the soy sauce for tamari or coconut aminos, which are both gluten-free and taste fantastic in this glaze. Everything else in the recipe is naturally gluten-free, so that one swap covers it.
- → Why does my glaze keep burning?
Honey burns fast at high heat that's the usual culprit. Once you add the soy sauce and honey to the pan, drop the heat to medium and keep stirring. Don't walk away, don't check your phone. Two to three minutes of attentive stirring and you'll have a perfect, glossy glaze every time.
Sticky Chicken Rice Bowls for Meal Prep
Sticky chicken rice bowls packed with high-protein chicken, fluffy rice, and a savory-sweet glaze. Easy meal prep for the whole week.
Ingredients
Fluffy Jasmine Base
- 2 cups jasmine rice, rinsed
- 2 and 3/4 cups low-sodium chicken broth
- 1 tsp sesame oil
- 1/2 tsp salt
Golden Seared Chicken
- 2 lbs boneless, skinless chicken thighs
- 1 tbsp avocado oil
- 1/2 tsp garlic powder
- 1/2 tsp black pepper
Glossy Sticky Glaze
- 1/3 cup low-sodium soy sauce
- 3 tbsp honey
- 2 tbsp rice vinegar
- 1 tbsp fresh ginger, grated
- 4 cloves garlic, minced
- 1 tbsp cornstarch
- 2 tbsp water
Fresh Bowl Toppings
- 3 stalks green onions, thinly sliced
- 1 tbsp toasted sesame seeds
- 1 cup shredded purple cabbage
- 1 medium cucumber, thinly sliced
Instructions
-
1Cook the RiceAdd 2 cups rinsed jasmine rice, 2 and 3/4 cups low-sodium chicken broth, 1 tsp sesame oil, and 1/2 tsp salt to a medium saucepan. Bring to a boil, then reduce heat to low, cover, and simmer for 15 minutes. Remove from heat and let steam for 5 minutes before fluffing with a fork.
-
2Season the ChickenPat 2 lbs boneless, skinless chicken thighs completely dry with paper towels. Drizzle with 1 tbsp avocado oil, then season evenly on both sides with 1/2 tsp garlic powder and 1/2 tsp black pepper. Drying the chicken ensures a golden, caramelized sear rather than steaming in the pan.
-
3Sear Chicken GoldenHeat a large skillet over medium-high heat until very hot. Add the seasoned chicken thighs and sear undisturbed for 5-6 minutes per side until deeply golden brown and cooked through to an internal temperature of 165°F. Transfer to a cutting board and let rest for 5 minutes before slicing.
-
4Build the GlazeIn the same skillet over medium heat, combine 1/3 cup low-sodium soy sauce, 3 tbsp honey, 2 tbsp rice vinegar, 1 tbsp freshly grated ginger, and 4 cloves minced garlic. Stir and bring to a gentle simmer for 2 minutes, allowing the garlic and ginger to bloom and the flavors to meld beautifully.
-
5Thicken the SauceIn a small bowl, whisk together 1 tbsp cornstarch and 2 tbsp water until smooth to create a slurry. Pour it into the simmering glaze while stirring constantly. Cook for 1-2 minutes until the sauce thickens into a glossy, sticky consistency that coats the back of a spoon perfectly.
-
6Glaze the ChickenSlice the rested chicken thighs into strips and return them to the skillet with the sticky glaze. Toss well to coat every piece thoroughly. For the best Sticky Chicken Rice Bowls | High-Protein Meal Prep, let the chicken simmer in the glaze for 1-2 minutes so it absorbs maximum flavor before assembling.
-
7Prep Fresh ToppingsWhile the chicken glazes, thinly slice 3 stalks of green onions, slice 1 medium cucumber, and measure out 1 cup shredded purple cabbage and 1 tbsp toasted sesame seeds. These fresh toppings add crunch, color, and brightness that make your Sticky Chicken Rice Bowls | High-Protein Meal Prep visually stunning and nutritionally balanced.
-
8Assemble Your BowlsDivide the fluffy sesame jasmine rice evenly among 4 bowls or meal prep containers. Top each with generous portions of sticky glazed chicken, shredded purple cabbage, and cucumber slices. Finish with sliced green onions and toasted sesame seeds. These Sticky Chicken Rice Bowls | High-Protein Meal Prep are ready to serve or store immediately.
Notes
🍗 Meal Prep Storage: Store assembled Sticky Chicken Rice Bowls | High-Protein Meal Prep in airtight containers in the refrigerator for up to 4 days. Keep the fresh toppings like cucumber and cabbage separate until ready to eat to prevent sogginess and maintain the best texture.
🔄 Protein Swap: Chicken thighs deliver the juiciest results, but boneless chicken breasts, salmon fillets, or extra-firm tofu work beautifully with this sticky glaze. Adjust cook times accordingly — breasts need about 6-7 minutes per side and tofu needs 4-5 minutes per side until golden.
🍯 Glaze Tip: For an extra-thick, restaurant-style glaze, double the cornstarch slurry. You can also add 1 tsp chili garlic sauce or a pinch of red pepper flakes to the glaze for a sweet-heat kick that takes this recipe to the next level.
🥢 Serving Suggestion: Serve these bowls with a drizzle of sriracha mayo (2 tbsp mayo + 1 tsp sriracha) for a creamy contrast to the sticky glaze. A side of steamed edamame or a soft-boiled egg adds even more protein to make this a truly satisfying high-protein meal.
Equipment
Please check ingredients for potential allergens and consult a health professional if in doubt.
Nutrition Facts
It is important to consider this information as approximate and not to use it as definitive health advice.
Comments
Leave a Comment