


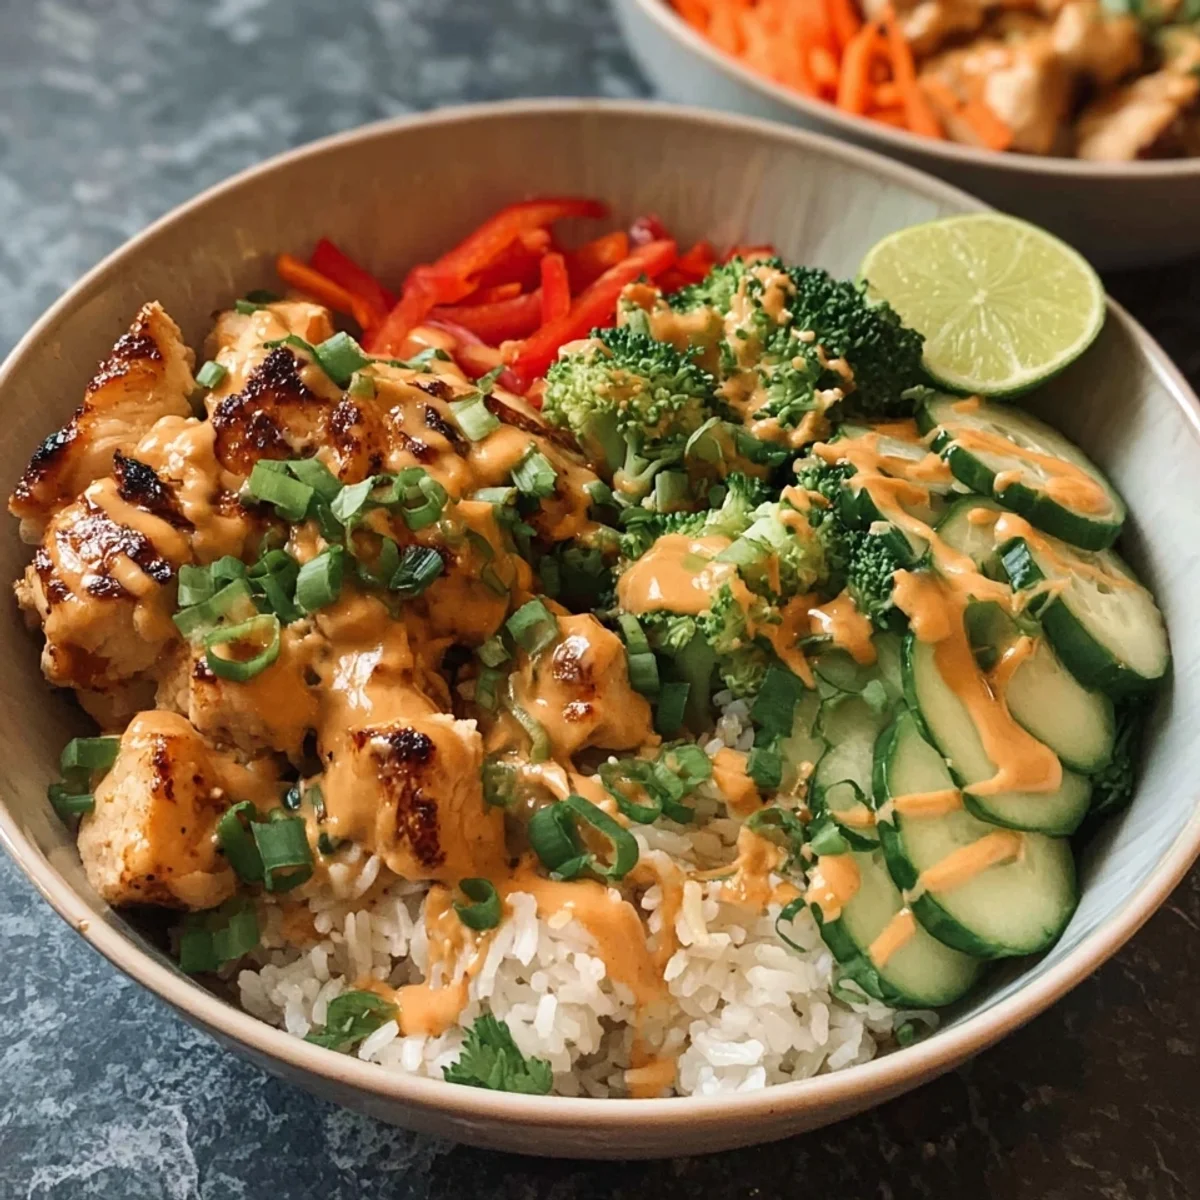
Thai peanut chicken buddha bowl packed with protein, fresh veggies, and a creamy peanut sauce. Ready in 30 minutes.
Okay, so this recipe happened because I was desperately trying to recreate a bowl I'd had at this tiny Thai-inspired café that closed down way too soon. I was heartbroken, honestly. After about four messy, sauce-splattered attempts in my kitchen, I finally nailed it and maybe even made it better? This creamy Thai peanut chicken bowl has become my most-requested weeknight dinner, and I am so excited to finally share it with you.
Okay, confession time. My very first attempt at the peanut sauce? I mixed up tablespoons and teaspoons for the soy sauce. The result was basically a salt lick with peanut butter vibes. I didn't expect that one small mistake to completely tank the whole sauce, but wow, it did. Now I measure everything twice. Learn from my salty, salty mistakes, friends.
Thai Peanut Chicken Bowl: Ingredients You'll Need
- 1 cup jasmine rice: Jasmine rice is non-negotiable for me here it has this delicate floral aroma that pairs so beautifully with coconut milk. I've tried long-grain white rice in a pinch and it works, but it just doesn't have that same magic. The slightly sticky texture of jasmine rice also helps it hold up under all those gorgeous toppings without turning into a soggy mess at the bottom of your bowl.
- 3/4 cup coconut milk + 3/4 cup water: This combo is the secret weapon of this whole dish. Full-fat coconut milk gives the rice this subtle richness and creaminess that makes every single bite feel a little luxurious. I once used light coconut milk to save calories and honestly regretted it the flavor was just flat. Use the good stuff. The water balances it out so the rice isn't overly rich, just perfectly fragrant.
- 3/4 lb boneless skinless chicken breast, thinly sliced: Thinly slicing the chicken is a game-changer for this Thai peanut chicken bowl it cooks fast, gets beautifully golden on the edges, and soaks up the marinade so much better than thick chunks. I pop mine in the freezer for about 10 minutes before slicing to make it easier to cut thin, even pieces. It sounds fussy but it takes 10 seconds of planning and makes a huge difference.
- 1 tbsp sesame oil: Sesame oil is one of those ingredients that smells like it's doing something magical the second it hits the pan. It adds this warm, nutty depth to the chicken marinade that you just can't fake with any other oil. A little goes a long way don't be tempted to add more, or it can get a bit overwhelming. Just that one tablespoon is enough to make the whole kitchen smell incredible.
- 3 tbsp creamy peanut butter: This is the heart of the whole Thai peanut chicken bowl experience, honestly. I always use a good-quality creamy peanut butter the kind that's just peanuts and salt, no added sugars or oils. Natural peanut butter gives you a cleaner, more intense peanut flavor that really shines in the sauce. I've made this with the sugary stuff in a pinch and it works, but the sauce tastes a little too sweet and one-dimensional.
- 2 tbsp soy sauce (for the sauce) + 1 tbsp soy sauce (for marinade): Soy sauce does double duty in this recipe it's in both the marinade and the peanut sauce, and I love that cohesion. It brings that savory, umami backbone that ties everything together. I use regular soy sauce, but low-sodium works great if you're watching salt levels. Just don't skip it in either place trust me, I tried once and the whole dish tasted weirdly flat and missing something.
How to Make a Thai Peanut Chicken Bowl Step by Step
- Step 1: Cook Coconut Rice:
- Start by combining your jasmine rice, coconut milk, water, and salt in a medium saucepan. Give it a good stir and bring it to a boil over medium-high heat. Once it's bubbling, drop the heat to low, slap on a tight lid, and let it do its thing for about 15 minutes. No peeking! I know it's tempting. When it's done, take it off the heat and let it steam for another 5 minutes. Fluff with a fork and just breathe in that coconut fragrance this rice is the dreamy base that makes the whole Thai peanut chicken bowl feel so complete and satisfying.
- Step 2: Whisk Peanut Sauce:
- This is the step I look forward to most, honestly. Grab a bowl and whisk together the peanut butter, soy sauce, and any other sauce additions you're using a splash of lime juice, a drizzle of honey, maybe some sriracha if you're feeling spicy. The sauce will look thick and clumpy at first and you'll think something went wrong. It hasn't! Just keep whisking and it'll come together into this gorgeous, glossy, creamy sauce. Add a tablespoon of warm water if it needs loosening. Set it aside and try not to eat it straight from the bowl.
- Step 3: Marinate the Chicken:
- Toss your thinly sliced chicken breast with soy sauce, sesame oil, and garlic powder in a bowl. Use your hands yes, really to make sure every piece is evenly coated. Even a 10-minute marinade makes such a difference in flavor here. The sesame oil gives the chicken this gorgeous nutty coating, and the soy sauce starts building that savory depth that'll carry through the whole Thai peanut chicken bowl. I've skipped the marinating step when I was in a rush and you can taste the difference. It's worth the extra few minutes.
- Step 4: Sear Chicken Golden:
- Get your skillet screaming hot like, actually hot before you add the chicken. A hot pan means golden, slightly crispy edges instead of sad, steamed, gray chicken. Cook the slices in a single layer without crowding them. I learned this the hard way when I dumped everything in at once and ended up with a watery, steamed mess. Work in batches if you need to! You want each piece to have beautiful caramelized color on both sides. That golden sear is what makes this Thai peanut chicken bowl feel restaurant-worthy rather than just... fine.
- Step 5: Prep Fresh Toppings:
- While the chicken rests, this is your moment to prep all the fresh stuff shredded purple cabbage, sliced cucumbers, shredded carrots, edamame, sliced avocado, whatever you love. I always have a little toppings station going on my cutting board and it makes assembly so fun. Honestly, this is where you get to make the bowl your own. The crunch and freshness of the raw veggies are such an important contrast to the rich, creamy peanut sauce. Don't skip this step thinking the chicken and rice are enough the toppings are what elevate everything.
- Step 6: Slice, Assemble, Garnish and Serve:
- Let the chicken rest for a couple of minutes, then slice it if needed. Now comes the fun part building your Thai peanut chicken bowl! Scoop that fragrant coconut rice into your bowls first, then arrange your toppings in little sections around the edges like a proper restaurant bowl. Layer the golden chicken right on top. Drizzle that gorgeous peanut sauce generously over everything don't be shy with it. Finish with a sprinkle of sesame seeds, sliced green onions, maybe some crushed peanuts for crunch, and a wedge of lime on the side. It's almost too pretty to eat. Almost.
Honestly, making this bowl on a weeknight feels like a little act of self-care. The kitchen smells incredible toasty sesame, fragrant coconut rice, that nutty peanut sauce coming together. It's one of those cooking experiences where every step feels satisfying. There's something really grounding about building a beautiful bowl from scratch, even on a chaotic Tuesday night when everything else feels like a lot.
Storage Tips for Your Thai Peanut Chicken Bowl
Store everything separately if you can that's the big lesson I learned after assembling a leftover bowl and ending up with soggy rice and wilted veggies the next day. Keep the coconut rice in an airtight container in the fridge for up to 4 days. The chicken stores beautifully for 3-4 days too. The peanut sauce is the MVP of leftovers it keeps in a jar in the fridge for up to a week and thickens up overnight, so just stir in a splash of warm water to loosen it before using. Fresh toppings like avocado and cucumber should be prepped fresh each time. I've also frozen the cooked chicken with great results just thaw overnight in the fridge and reheat gently in a skillet.

Easy Swaps for the Perfect Thai Peanut Chicken Bowl
Oh, I've experimented a lot here! If you're not a chicken person, thinly sliced beef or shrimp work beautifully shrimp especially cooks so fast and soaks up that sesame-soy marinade like a dream. For a vegetarian version, extra-firm tofu pressed and pan-fried until golden is genuinely delicious. Swap jasmine rice for brown rice or even cauliflower rice if that's your thing just adjust cooking times. Almond butter is a surprisingly good swap for peanut butter if you have a peanut allergy, though the flavor is a bit milder. Coconut aminos work perfectly in place of soy sauce for a gluten-free version. I've also used full-fat oat milk instead of coconut milk for the rice when I was in a pinch it's not the same, but it's honestly not bad either.
Serving Your Thai Peanut Chicken Bowl with Style
This bowl is pretty much a complete meal on its own, but if you're feeding a crowd or just want to go all out, a few things pair really well with it. A simple miso soup on the side adds a lovely warm, savory contrast. Spring rolls fresh, not fried are a perfect starter that keeps things light and fresh. For drinks, an iced Thai tea is the obvious dream pairing, but a crisp sparkling water with lime is equally refreshing. If you're hosting, set up a little topping bar so everyone can build their own bowl it's such a fun, interactive dinner party situation. Crushed roasted peanuts, extra lime wedges, fresh cilantro, and chili flakes on the side let everyone customize their experience.
The Cultural Backstory Behind the Thai Peanut Chicken Bowl
Thai cuisine has such a beautiful tradition of balancing bold, contrasting flavors salty, sweet, sour, and spicy all living harmoniously in one dish. The peanut sauce in this recipe draws inspiration from satay-style peanut sauces that are beloved across Thailand and much of Southeast Asia. Buddha bowls as a concept are more of a modern Western interpretation of balanced, nourishing eating, but the flavors here are rooted in real Thai culinary tradition. I first fell in love with these flavor combinations during a Thai cooking class I stumbled into while traveling, and I've been chasing that balance ever since. This Thai peanut chicken bowl is my home cook's love letter to those bold, vibrant Thai flavors imperfect but made with so much heart.
I really hope this bowl brings as much joy to your kitchen as it has to mine. There's something so satisfying about a meal that looks gorgeous, tastes incredible, and actually comes together on a regular weeknight. If you make it, please drop a comment below I genuinely love hearing how it turns out for you! Tag me in your bowl photos too. Happy cooking, friends!

Frequently Asked Questions About Thai Peanut Chicken Bowl
- → Can I meal prep this Thai peanut chicken bowl ahead of time?
You can prep the components separately cook the rice, make the sauce, and marinate or even cook the chicken ahead. Store everything in separate containers and assemble fresh when you're ready to eat. It makes weeknight dinners so much faster and the flavors actually deepen overnight.
- → Is this recipe spicy?
As written, it's pretty mild and family-friendly! The heat level is totally in your hands though. Add sriracha or chili flakes to the peanut sauce if you want a kick. I usually add a good squeeze of sriracha to mine because I love a little heat, but it's great without it too.
- → Can I use rotisserie chicken instead of cooking fresh?
Honestly, yes! Shredded rotisserie chicken is a fantastic shortcut here. You'll miss the golden sear, but tossing it in a bit of sesame oil and soy sauce before adding it to your bowl helps a lot. It's a great option for those nights when cooking feels like too much.
- → What if my peanut sauce is too thick?
Just whisk in warm water, one tablespoon at a time, until it reaches a drizzleable consistency. I find that the sauce thickens up quite a bit as it sits, so don't panic a little warm water fixes it every time. Warm the sauce slightly first for the best results.
- → How do I make this Thai peanut chicken bowl gluten-free?
Super easy swap! Just replace the regular soy sauce with tamari or coconut aminos in both the marinade and the peanut sauce. Everything else in the recipe is naturally gluten-free. The flavor is nearly identical and you'd honestly never notice the difference.
Thai Peanut Chicken Buddha Bowl
Thai peanut chicken buddha bowl packed with protein, fresh veggies, and a creamy peanut sauce. Ready in 30 minutes.
Ingredients
Coconut Rice Foundation
- 1 cup jasmine rice
- 3/4 cup coconut milk
- 3/4 cup water
- 1/4 tsp salt
Golden Seared Chicken
- 3/4 lb boneless skinless chicken breast, thinly sliced
- 1 tbsp soy sauce
- 1 tbsp sesame oil
- 1/2 tsp garlic powder
Creamy Thai Peanut Drizzle
- 3 tbsp creamy peanut butter
- 2 tbsp soy sauce
- 1 tbsp fresh lime juice
- 1 tbsp honey
- 1 tsp sriracha
- 1 tsp freshly grated ginger
- 2 tbsp warm water
Fresh Bowl Toppings
- 1 cup shredded purple cabbage
- 1 medium carrot, julienned
- 1/4 cup roasted salted peanuts
- 2 tbsp fresh cilantro, for garnish
- 1 lime, cut into wedges, for garnish
Instructions
-
1Cook Coconut RiceCombine 1 cup jasmine rice, 3/4 cup coconut milk, 3/4 cup water, and 1/4 tsp salt in a medium saucepan. Bring to a boil over medium-high heat, then reduce to low, cover, and simmer for 15 minutes until liquid is fully absorbed and rice is fluffy.
-
2Whisk Peanut SauceIn a small bowl, whisk together 3 tbsp creamy peanut butter, 2 tbsp soy sauce, 1 tbsp fresh lime juice, 1 tbsp honey, 1 tsp sriracha, 1 tsp freshly grated ginger, and 2 tbsp warm water until completely smooth and pourable. Set aside - this sauce is the heart of your Creamy Thai Peanut Chicken Buddha Bowl.
-
3Marinate the ChickenIn a medium bowl, toss 3/4 lb thinly sliced boneless skinless chicken breast with 1 tbsp soy sauce, 1 tbsp sesame oil, and 1/2 tsp garlic powder. Coat evenly and let the chicken marinate for at least 5 minutes while your pan heats up.
-
4Sear Chicken GoldenHeat a large skillet over medium-high heat. Add the marinated chicken in a single layer and sear for 3–4 minutes per side until deeply golden and cooked through to an internal temperature of 165°F. For the best Creamy Thai Peanut Chicken Buddha Bowl, avoid overcrowding the pan so the chicken caramelizes rather than steams.
-
5Prep Fresh ToppingsWhile the chicken rests, prepare your fresh bowl toppings. Shred 1 cup purple cabbage and julienne 1 medium carrot into thin matchsticks. Roughly chop 2 tbsp fresh cilantro and cut 1 lime into wedges. Measure out 1/4 cup roasted salted peanuts and set everything aside.
-
6Slice Rested ChickenAllow the seared chicken to rest for 2–3 minutes off the heat before slicing. This keeps every bite of your Creamy Thai Peanut Chicken Buddha Bowl juicy and tender. Slice the chicken against the grain into thin, even strips for the best texture and presentation.
-
7Assemble the BowlsDivide the coconut rice evenly between two wide bowls. Arrange the sliced chicken, shredded purple cabbage, and julienned carrot in separate sections over the rice. Building your Creamy Thai Peanut Chicken Buddha Bowl with distinct sections makes it visually stunning and lets each ingredient shine.
-
8Garnish and ServeGenerously drizzle the creamy Thai peanut sauce over each bowl. Scatter 1/4 cup roasted salted peanuts on top, then finish with fresh cilantro and lime wedges on the side. Serve immediately - squeeze lime over everything just before eating for a bright, zesty finish to your Creamy Thai Peanut Chicken Buddha Bowl.
Notes
Make-Ahead Tip: The peanut sauce can be made up to 5 days in advance and stored in an airtight jar in the refrigerator. If it thickens, simply whisk in 1 tsp of warm water at a time until it reaches a drizzleable consistency.
Storage Advice: Store bowl components separately in airtight containers in the fridge for up to 3 days. Keep the fresh toppings and peanut sauce separate from the rice and chicken to prevent sogginess. Reheat the rice and chicken gently in the microwave before reassembling.
Substitution Tips: Swap chicken breast for boneless skinless chicken thighs for a richer, more forgiving protein that's harder to overcook. For a vegetarian version, substitute crispy baked tofu or roasted chickpeas — both pair beautifully with the peanut drizzle.
Serving Suggestion: For extra freshness and color, add sliced avocado, thinly sliced cucumber, or a soft-boiled egg to your bowl. A drizzle of extra sriracha on top adds a welcome kick for spice lovers.
Equipment
Please check ingredients for potential allergens and consult a health professional if in doubt.
Nutrition Facts
It is important to consider this information as approximate and not to use it as definitive health advice.
Comments
Leave a Comment