


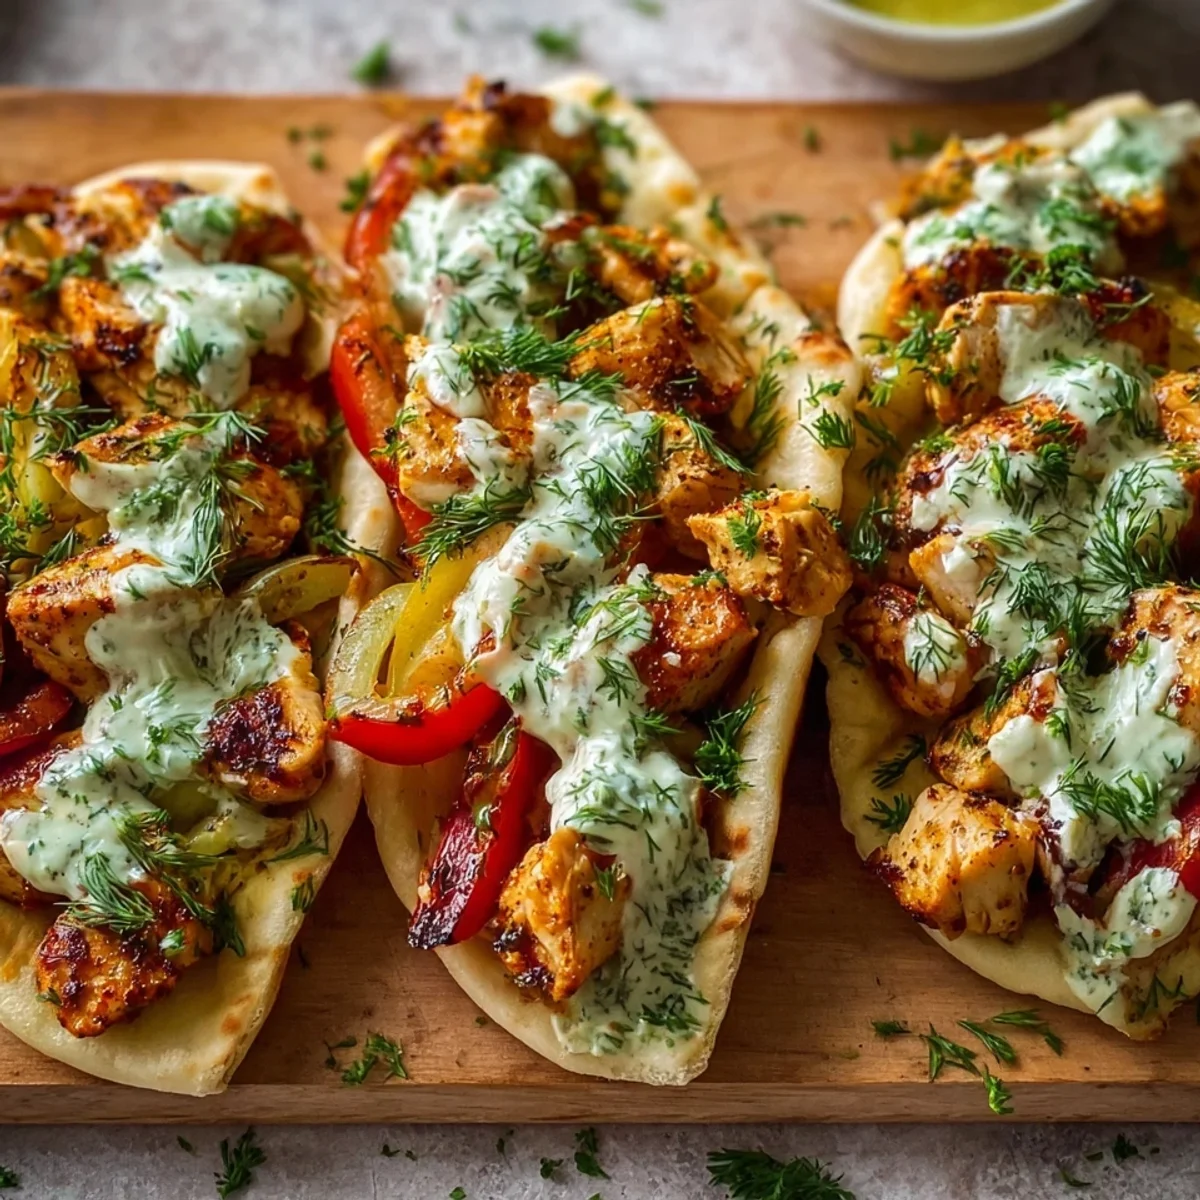
Sheet pan chicken pitas loaded with juicy roasted chicken and a fresh herby ranch sauce. Easy weeknight dinner ready in 35 minutes.
Okay, so this whole recipe started on a Tuesday night when I had chicken thighs thawing in the fridge and zero motivation to do anything complicated. I'd been eyeing pita bread at the store for weeks, and something just clicked. I threw everything on a sheet pan, whipped up a quick herby ranch, and honestly? My family lost their minds. Sheet pan chicken pitas have been on our weekly rotation ever since. No regrets.
Oops okay, I have to tell you about the time I forgot to line my sheet pan. The chicken stuck like it had made a permanent home there, and I basically had to chisel it off. I didn't expect that much drama from a simple dinner! Foil or parchment paper, friends. Non-negotiable. Learn from my scrubbing-the-pan-for-twenty-minutes mistake so you don't have to.
Sheet Pan Chicken Pitas: Ingredients You'll Need
- 1 1/2 lbs boneless skinless chicken thighs: chicken thighs are the unsung heroes of weeknight cooking, and honestly, I'd never go back to breasts for sheet pan chicken pitas. Thighs have way more fat running through them, which means they stay juicy and tender even if you accidentally leave them in the oven a couple minutes too long. I've made that mistake more than once! They're also cheaper, which is a bonus I never complain about.
- 2 tbsp olive oil: Olive oil is what helps that gorgeous golden crust form on the chicken, and it also carries all the spices into every little crevice. I use a good but not fancy olive oil here save the expensive stuff for drizzling on salads. Two tablespoons feels like just enough to coat everything without making it greasy. I've gone overboard before and ended up with a smoky kitchen. Not fun.
- 1 tsp smoked paprika: Smoked paprika is my secret weapon in so many recipes, and it's what gives this dish that deep, almost barbecue-y warmth without any actual grill. The smokiness pairs beautifully with the herby ranch and makes the chicken look stunning like a gorgeous reddish-orange color when it comes out of the oven. I once subbed regular paprika and it was fine, but smoked is where the magic lives. Don't skip it.
- 1 tsp garlic powder: Fresh garlic is great, but garlic powder is actually better here because it distributes evenly across the chicken without burning on the hot sheet pan. I learned that the hard way minced fresh garlic goes from golden to bitter and charred fast in a hot oven. Garlic powder gives you that savory, mellow depth throughout every single bite without any bitter surprises. It's one of those pantry staples I always keep stocked.
- 1/2 cup sour cream: Sour cream is the base of this herby ranch, and it gives the sauce a tangy creaminess that feels lighter than a pure mayo situation. In sheet pan chicken pitas, you want a sauce that's rich enough to feel indulgent but not so heavy it weighs everything down. Full-fat sour cream works best here I tried low-fat once and it was a little watery and sad. Treat yourself to the real thing!
- 1 tbsp fresh dill, chopped: Fresh dill is what makes this ranch taste herby and alive instead of just creamy and flat. Dried dill works in a pinch, but fresh dill has this bright, almost grassy flavor that just sings. I grow dill on my windowsill now specifically because of this recipe I didn't expect to become a tiny herb gardener, but here we are. Chop it fine so it distributes through every spoonful of that sauce.
How to Make Sheet Pan Chicken Pitas Step by Step
- Step 1: Preheat and Prep:
- Getting your oven screaming hot we're talking 425°F is the first real step to nailing sheet pan chicken pitas. A properly preheated oven means the chicken starts cooking the second it hits the pan, which helps develop that beautiful caramelized exterior. While the oven heats up, line your sheet pan with foil or parchment paper. I cannot stress this enough. Future you will be so grateful when cleanup takes thirty seconds instead of thirty minutes. Get everything ready to go!
- Step 2: Season the Chicken:
- This is honestly my favorite step because the kitchen already starts smelling incredible. Toss those chicken thighs with olive oil first so the spices have something to cling to, then hit them with the smoked paprika, garlic powder, onion powder, dried oregano, salt, and pepper. Use your hands yes, really, just get in there. You want every surface coated. I like to let them sit for five minutes after seasoning so the flavors start to penetrate a little before they hit the heat.
- Step 3: Roast the Chicken:
- Slide that pan into your hot oven and let the magic happen this is where sheet pan chicken pitas really earn their name. Roast the chicken thighs for about 25 to 28 minutes, flipping once halfway through if you want even browning on both sides. The smell that fills your kitchen is unreal smoky, garlicky, savory. You're looking for an internal temp of 165°F and edges that are just starting to get a little crispy. Resist the urge to open the oven every five minutes. I know it's hard!
- Step 4: Make Herby Ranch:
- While the chicken does its thing in the oven, whisk together the sour cream, mayo, fresh dill, and a pinch of salt and pepper. To be real, I sometimes add a tiny squeeze of lemon juice too it brightens everything up. This sauce comes together in literally two minutes and it's the component that makes sheet pan chicken pitas feel really special and restaurant-worthy. Taste it and adjust the seasoning. If it needs more dill, add more dill. No rules here, just vibes and flavor.
- Step 5: Prep Fresh Toppings:
- Chop up whatever fresh toppings make your heart happy I usually go with sliced cucumber, halved cherry tomatoes, thinly sliced red onion, and some shredded lettuce. This step is where everyone in my family gets opinionated and starts requesting their specific combination. It's chaos but it's fun chaos. Having everything prepped and ready to go before the chicken comes out means you can assemble fast and eat while everything is still warm. Mise en place, as the fancy chefs say!
- Step 6–8: Warm Pitas, Slice Chicken, and Assemble:
- Warm your pitas directly on the oven rack for about two minutes they get soft and slightly puffed and it makes such a difference. Then slice that gorgeous roasted chicken into strips or chunks, whichever you prefer. Assembly is the best part of sheet pan chicken pitas because everyone builds their own and it turns dinner into a little interactive moment. Spread herby ranch generously, pile on chicken and toppings, and eat immediately. Don't wait. Warm pitas with cold toppings and creamy sauce is the combination of your dreams.
There's something about the moment that sheet pan comes out of the oven that sizzle, the color on the chicken, the smell hitting you all at once that makes me feel like I actually know what I'm doing in the kitchen. This recipe is low-effort but high-reward in the best possible way. It's the kind of dinner that makes a regular Tuesday feel a little special.
Storage Tips for Sheet Pan Chicken Pitas
Store leftover chicken separately from the pitas and toppings this is the key move I wish someone had told me sooner. The chicken keeps beautifully in an airtight container in the fridge for up to four days. Reheat it in a skillet over medium heat or pop it back in the oven at 375°F for about ten minutes to bring back some of that roasted texture. The microwave works in a pinch but it can make the chicken a little rubbery, just warning you. The herby ranch keeps in the fridge for up to five days it actually gets better as it sits! Pitas are best fresh but can be stored in a zip bag at room temperature for a day or two. I once stored everything assembled together and ended up with a soggy, sad situation. Keep it all separate and you're golden.

Ingredient Substitutions Worth Trying in Sheet Pan Chicken Pitas
Honestly, this recipe is super flexible and I've swapped things around plenty of times. Chicken breasts work if that's what you have, just watch them closely since they dry out faster than thighs. Greek yogurt is a fantastic swap for sour cream in the herby ranch it's tangier and a little lighter, and I actually prefer it sometimes. No fresh dill? Dried dill works at about one teaspoon, or swap in fresh parsley or chives for a different vibe. For a dairy-free version, I've used a plant-based sour cream and vegan mayo and it was surprisingly great. Naan or flatbread can stand in for pitas if that's what's in your pantry. To be real, the spice blend is also totally adjustable cumin or chili powder can swap in for the paprika if you want a different flavor direction.
Serving Sheet Pan Chicken Pitas for Any Occasion
Sheet pan chicken pitas are genuinely a full meal on their own, but if you want to round things out, a simple Greek salad on the side is perfection just cucumbers, tomatoes, olives, and feta with a drizzle of olive oil. A bowl of hummus and some extra pita for dipping is always a crowd-pleaser and takes zero effort. For a fun dinner party spread, set up a little build-your-own pita station with all the toppings in small bowls people go absolutely wild for it. I've also served these alongside a simple lemon rice pilaf when I wanted something more substantial. For drinks, a cold sparkling water with lemon or a crisp white wine like Sauvignon Blanc cuts through the richness of the herby ranch beautifully. This meal just plays well with everything!
The Delicious Backstory of Sheet Pan Chicken Pitas
Pita bread has roots going back thousands of years across the Middle East and Mediterranean it's one of the oldest breads in human history, and there's something kind of beautiful about stuffing it with spiced chicken and herby sauce in a modern American kitchen. The flavor profile of this dish pulls inspiration from Greek and Lebanese street food traditions, where grilled or roasted chicken tucked into warm pita with cooling sauces is basically a way of life. My personal connection to this style of food started at a tiny Mediterranean restaurant near my college apartment where I ate chicken pitas embarrassingly often. I've been chasing that flavor ever since, and these sheet pan chicken pitas are honestly the closest I've gotten in my own kitchen. It feels like a little love letter to that era of my life every time I make it.
I really hope these sheet pan chicken pitas become a staple in your kitchen the way they have in mine. They're the kind of recipe that feels like a hug easy, satisfying, and always a hit. If you make them, please come back and leave a comment! Tell me what toppings you used, what you swapped, or if your family was as obsessed as mine. I love hearing from you!

Frequently Asked Questions about Sheet Pan Chicken Pitas
- → Can I use chicken breasts instead of thighs for this recipe?
You can! Chicken breasts work fine but they dry out faster, so keep a close eye on them and pull them at 165°F internal temp. I'd check around the 20-minute mark. Thighs are more forgiving and stay juicier, which is why I always reach for them first.
- → Can I make sheet pan chicken pitas ahead of time?
The chicken and herby ranch can both be made a day ahead and stored separately in the fridge they actually taste great the next day. Just reheat the chicken in the oven or a skillet and warm fresh pitas right before serving. Don't assemble ahead or everything gets soggy!
- → What toppings work best in these pitas?
Honestly, so many things work! My go-to combo is cucumber, cherry tomatoes, red onion, and shredded lettuce. Crumbled feta, pickled red onions, kalamata olives, or sliced avocado are all amazing additions. Keep it fresh and crunchy for the best contrast against the warm, juicy chicken.
- → How do I keep the pitas from getting soggy?
Two tricks: warm the pitas right before serving, and don't spread the ranch too far in advance. The sauce soaks into the bread quickly, so assemble and eat right away. Also, make sure your fresh toppings are patted dry excess water from cucumbers or tomatoes speeds up the sogginess.
- → Can I make this recipe gluten-free?
Yes! Just swap the regular pitas for gluten-free pita or flatbread several brands are available at most grocery stores now. Everything else in the recipe is naturally gluten-free. Double-check your spice labels if you have a serious sensitivity, since some brands process in shared facilities.
Sheet Pan Chicken Pitas with Herby Ranch
Sheet pan chicken pitas loaded with juicy roasted chicken and a fresh herby ranch sauce. Easy weeknight dinner ready in 35 minutes.
Ingredients
Smoky Sheet Pan Chicken
- 1 1/2 lbs boneless skinless chicken thighs
- 2 tbsp olive oil
- 1 tsp smoked paprika
- 1 tsp garlic powder
- 1/2 tsp onion powder
- 1/2 tsp dried oregano
- Salt and pepper to taste
Herby Ranch Drizzle
- 1/2 cup sour cream
- 2 tbsp mayonnaise
- 1 tbsp fresh dill, chopped
- 1 tbsp fresh chives, chopped
- 1 clove garlic, minced
- 2 tbsp buttermilk
Warm Pita Wraps
- 4 whole wheat pita breads
- 1 tbsp olive oil
Fresh Crunch Toppings
- 1 cup cherry tomatoes, halved
- 1 cup romaine lettuce, shredded
- 1/2 cup English cucumber, thinly sliced
- 1/4 cup red onion, thinly sliced
Instructions
-
1Preheat and PrepPreheat your oven to 425°F and line a large sheet pan with foil or parchment paper. This high heat is the secret to getting perfectly caramelized chicken for your Easy Sheet Pan Chicken Pitas with Herby Ranch, so don't skip preheating!
-
2Season the ChickenPat 1 1/2 lbs boneless skinless chicken thighs dry with paper towels. In a large bowl, toss the chicken with 2 tbsp olive oil, 1 tsp smoked paprika, 1 tsp garlic powder, 1/2 tsp onion powder, 1/2 tsp dried oregano, and salt and pepper to taste until evenly coated.
-
3Roast the ChickenArrange the seasoned chicken thighs in a single layer on your prepared sheet pan. Roast at 425°F for 22-25 minutes, flipping halfway through, until the internal temperature reaches 165°F and the edges are nicely caramelized. This smoky chicken is the heart of your Easy Sheet Pan Chicken Pitas with Herby Ranch.
-
4Make Herby RanchWhile the chicken roasts, whisk together 1/2 cup sour cream, 2 tbsp mayonnaise, 2 tbsp buttermilk, 1 clove minced garlic, 1 tbsp fresh chopped dill, and 1 tbsp fresh chopped chives in a small bowl. Season with salt and pepper, then refrigerate until ready to serve.
-
5Prep Fresh ToppingsWhile the chicken finishes cooking, prepare your Fresh Crunch Toppings. Halve 1 cup cherry tomatoes, shred 1 cup romaine lettuce, thinly slice 1/2 cup English cucumber, and thinly slice 1/4 cup red onion. Arrange everything on a board or plate for easy assembly.
-
6Warm the PitasBrush all 4 whole wheat pita breads lightly with 1 tbsp olive oil. Place them directly on the oven rack or a second sheet pan during the last 3-4 minutes of the chicken's cook time, warming until soft and slightly toasted with golden edges.
-
7Slice the ChickenRemove the chicken from the oven and let it rest for 5 minutes - this step is key for the best Easy Sheet Pan Chicken Pitas with Herby Ranch, as resting locks in all the juices. Slice or chop the thighs into bite-sized strips for easy pita loading.
-
8Assemble and ServeBuild your Easy Sheet Pan Chicken Pitas with Herby Ranch by layering shredded romaine, sliced cucumber, cherry tomatoes, and red onion inside each warm pita. Top generously with sliced chicken and a big drizzle of the Herby Ranch. Serve immediately and enjoy!
Notes
💡 Cooking Tip: For extra crispy chicken thighs, make sure they are completely dry before seasoning and avoid overcrowding the sheet pan — give each piece breathing room so they roast rather than steam.
🥙 Serving Tip: Set up a build-your-own pita bar with all the toppings and ranch on the side — it's a fun, interactive dinner that works great for families or casual entertaining.
🔄 Substitution Tip: No buttermilk on hand? Mix 2 tbsp regular milk with a small squeeze of lemon juice and let it sit for 5 minutes as an easy swap. Greek yogurt also works beautifully in place of sour cream for a tangier, higher-protein ranch.
🧊 Storage Tip: Store leftover sliced chicken and ranch separately in airtight containers in the refrigerator for up to 3 days. Reheat the chicken in a skillet over medium heat to bring back that smoky, caramelized flavor before assembling fresh pitas.
Equipment
Please check ingredients for potential allergens and consult a health professional if in doubt.
Nutrition Facts
It is important to consider this information as approximate and not to use it as definitive health advice.
Comments
Leave a Comment