


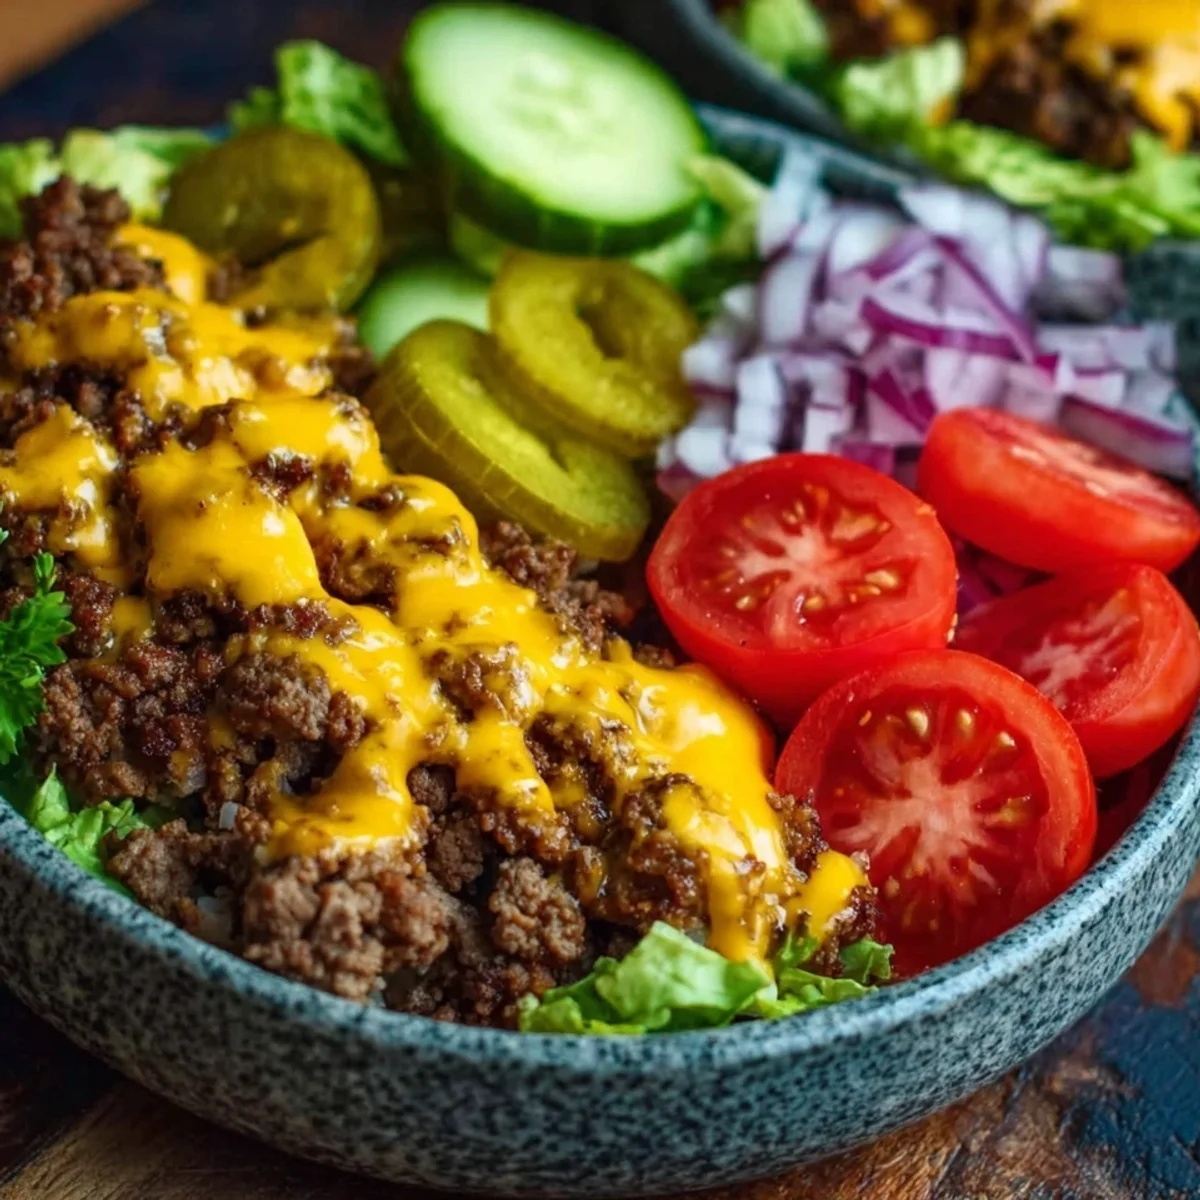
High protein cheeseburger bowls packed with seasoned beef, cheese, and fresh toppings a low carb meal prep solution ready in 30 minutes.
Okay so real talk I stumbled onto this recipe during a Sunday meal prep spiral where I was craving a cheeseburger but also trying to keep things lower carb. I literally just... deconstructed a burger into a bowl. And honestly? It was one of those happy accidents I keep coming back to every single week. These cheeseburger bowls have become my most-requested recipe among friends, and I am not even a little bit sorry about it.
Oops okay, I have to tell you about the time I got cocky and tried to melt the cheese directly into the hot skillet without turning the heat down first. Friends, it became a crispy, slightly burnt cheese situation that I tried to pass off as 'intentional.' My husband took one bite and just raised an eyebrow. Low heat, people. Learn from my hubris.
Cheeseburger Bowls: Everything You Need to Build the Perfect Bite
- 1 1/2 lbs 80/20 ground beef: This fat ratio is non-negotiable for me I tried lean ground beef once and the bowl tasted sad and dry. The 80/20 blend gives you that juicy, flavorful beef that makes cheeseburger bowls taste like an actual cheeseburger and not a sad diet meal. The fat also carries all those spices beautifully and helps the cheese melt right into the meat. Don't skimp here!
- 4 oz sharp cheddar cheese, shredded: Please, please shred your own cheddar. I know the bags are convenient I've grabbed them in a rush too but pre-shredded cheese has anti-caking powder that stops it from melting smoothly. Sharp cheddar specifically brings that bold, tangy flavor that screams classic cheeseburger. Block cheese, box grater, two minutes of your life. Totally worth it every single time.
- 4 strips bacon, cooked and crumbled: Bacon is the little detail that takes these bowls from good to absolutely unforgettable. I cook mine low and slow in the same skillet I use for the beef so nothing goes to waste that leftover bacon fat? It seasons the whole pan. Crumbled on top at the end, it stays crispy and adds this smoky, salty crunch that ties every bite together beautifully.
- 1/2 cup dill pickles, sliced: Don't you dare skip the pickles. I used to think they were optional until I made a batch without them and something felt deeply wrong. The briny, tangy punch of dill pickles cuts right through the richness of the beef and cheese and brings that unmistakable cheeseburger flavor home. I slice mine thin so you get a little pickle in every single forkful.
- 1 tsp garlic powder + 1 tsp onion powder + 1/2 tsp smoked paprika: This spice trio is the secret soul of the seasoned beef. Garlic powder and onion powder together mimic that savory depth you'd get from a well-seasoned burger patty, and the smoked paprika adds this subtle warmth that I didn't expect to love as much as I do. I actually mix these together first in a little bowl before adding them to the meat it distributes way more evenly that way.
- 1 cup cherry tomatoes, halved: Cherry tomatoes bring freshness and a little natural sweetness that balances all the salty, savory elements in the bowl. I always halve them rather than leaving them whole so the juices mingle into the greens base a little it's such a small thing but it makes the whole bowl feel more cohesive. In summer I use whatever's ripe from my garden and honestly it's a completely different level of good.
How to Make Cheeseburger Bowls Step by Step
- Step 1: Cook the Bacon:
- Start your bacon in a cold skillet and let it come up to heat gradually this is the trick to getting it perfectly crispy without burning. I cook mine over medium heat, flipping every couple minutes, until it's deeply golden and the whole kitchen smells incredible. Once it's done, pull it onto a paper towel-lined plate and let it drain. Don't wipe out that skillet! That bacon fat is liquid gold for the next step. Crumble the bacon once it cools I always sneak a piece here, no shame.
- Step 2: Mix Burger Sauce:
- While the bacon drains, whip together your burger sauce. My go-to is mayo, ketchup, a little yellow mustard, a splash of pickle brine, and a pinch of garlic powder it comes together in about two minutes and it is the flavor glue that holds these cheeseburger bowls together. Taste it as you go! I always end up adding a little extra pickle brine because I love that tangy kick. Make it your own. Stash it in the fridge while you cook the beef so the flavors can hang out and get friendly.
- Step 3: Season the Beef:
- In a large bowl, break up your ground beef and sprinkle over the garlic powder, onion powder, smoked paprika, salt, and pepper. I like to mix the spices together first so they distribute evenly learned that the hard way after biting into a clump of straight paprika once. Mix it gently with your hands just until everything is combined. Overworking ground beef makes it tough, and nobody wants that. The seasoning here is what gives the meat that burger-shop depth of flavor that makes these bowls so craveable.
- Step 4: Brown the Beef:
- Add your seasoned beef right into that bacon-fat skillet and let it cook over medium-high heat. Here's the thing resist the urge to stir it constantly! Let it sit and develop a real brown crust before breaking it up. That caramelization is where all the deep, savory flavor lives. I break mine into chunky crumbles rather than super fine pieces because I like a little texture in my cheeseburger bowls. Cook until there's no pink left and the beef smells absolutely amazing about 8 to 10 minutes total.
- Step 5: Melt the Cheese:
- Turn the heat down to low and I mean LOW, friends, this is where I went wrong that one embarrassing time then scatter your shredded sharp cheddar right over the hot beef. Put a lid on the skillet and let the steam do the work for about a minute. When you lift that lid, the cheese should be melted into glossy, gooey perfection draped over every piece of beef. I didn't expect how much this step would elevate the whole dish, but it really transforms the cheeseburger bowls from a simple meal prep into something that feels genuinely special.
- Step 6–8: Build, Top, and Dress:
- Now comes the fun part building your bowls! Lay down a generous base of crisp romaine or mixed greens, then spoon that cheesy beef right on top. Add your crumbled bacon, sliced dill pickles, diced white onion, and halved cherry tomatoes pile it all on and don't be shy. Drizzle your burger sauce over everything and serve immediately if you're eating now, or pack it all separately for meal prep. These cheeseburger bowls look genuinely beautiful when they're built up with all the toppings, and honestly they taste even better than they look.
Honestly, making these on a Sunday afternoon has become one of my favorite little rituals. The whole kitchen smells like a backyard cookout smoky bacon, sizzling seasoned beef, that sharp cheddar melting into everything. It's cozy and satisfying in a way that most meal prep just isn't. I usually put on a podcast, pour myself something cold, and just enjoy the process. Thirty minutes, four meals sorted. That's a good Sunday.
Storage Tips for Keeping Your Cheeseburger Bowls Fresh All Week
Here's what I've figured out after many, many meal prep Sundays and a few disappointing lunches. Store the beef and cheese mixture in an airtight container in the fridge for up to four days. Keep your greens in a separate container lined with a paper towel to absorb moisture. The toppings pickles, tomatoes, onion, bacon each do best in their own little containers or at least separated in a divided container. The burger sauce stays fresh in a sealed jar for up to five days. When you're ready to eat, warm the beef in the microwave for about 90 seconds, then build your bowl fresh. Oops I once combined everything Sunday night thinking I was being efficient. By Tuesday it was a soggy, sad situation. Keep it separate. Trust me on this one.

Easy Ingredient Swaps for Cheeseburger Bowls That Actually Work
To be real, I've played around with this recipe a lot and here's what actually works. Ground turkey is a solid swap for the beef if you want something leaner just add a teaspoon of olive oil to the pan so it doesn't dry out. Pepper jack cheese is fantastic in place of cheddar if you want a little heat. Turkey bacon works fine, though it won't leave that glorious fat in the pan for cooking the beef. For the greens base, shredded cabbage or spinach are great alternatives to romaine. Red onion is punchier than white onion if you love that sharp bite. And if you're out of smoked paprika, regular paprika plus a tiny pinch of cumin gets you surprisingly close to the same warm, smoky depth.
Serving Cheeseburger Bowls Like You Mean It
These cheeseburger bowls are honestly a complete meal on their own, but if you're feeding a crowd or just want to round things out, here are my favorite ways to serve them. A side of crispy air-fryer zucchini fries is my absolute go-to they feel indulgent but keep things low carb. Cauliflower rice works beautifully as an extra base layer if you want more volume. For a fun dinner party situation, I set up a little topping bar with extra pickles, sliced avocado, jalapeños, and different hot sauces so everyone can customize their own bowl. Sparkling water with lime or an ice-cold light beer are my drink pairings of choice. It's casual, it's fun, and people always go back for seconds.
The Delicious Backstory of Cheeseburger Bowls and Why They Hit Different
The American cheeseburger has been a backyard staple since at least the 1920s, and honestly it might be the most beloved comfort food in the country and for good reason. But the bowl format? That's a more recent evolution, born out of the low-carb and paleo movements of the 2010s when home cooks started asking why we needed the bun to enjoy all the best parts of a burger. I personally fell in love with this concept when I was trying to eat a little lighter without giving up the foods I actually loved. There's something really satisfying about honoring a classic while making it work for your lifestyle. These cheeseburger bowls feel like a love letter to the original all the flavor, all the fun, just served in a different vessel.
I really hope these cheeseburger bowls become a Sunday staple in your kitchen the way they have in mine. There's something so satisfying about a recipe that's fast, filling, and actually exciting to eat all week long. If you make them, please come back and tell me how it went drop a comment below, tag me in your meal prep photos, and let me know what toppings you added. I love seeing your versions!

Frequently Asked Questions about Cheeseburger Bowls
- → Can I make cheeseburger bowls ahead of time for the whole week?
You can prep everything up to four days ahead just store the beef, greens, toppings, and sauce separately. Assemble right before eating so nothing gets soggy. The beef actually tastes even better on day two once all those spices have had time to settle in together.
- → How much protein is in each cheeseburger bowl serving?
Each serving comes in around 40 to 45 grams of protein depending on your exact toppings and sauce the ground beef and bacon do the heavy lifting here. It's genuinely one of the most satisfying high-protein meals I make, and I never feel hungry an hour later.
- → Can I use a leaner ground beef for this recipe?
You can use 90/10 if you prefer, but I'd honestly recommend adding a drizzle of olive oil to the pan so the beef doesn't dry out. The 80/20 blend gives you so much more flavor and juiciness, and since we're skipping the bun, the fat content balances out pretty reasonably.
- → What greens work best as the bowl base?
Romaine is my personal favorite because it stays crisp and has a mild flavor that lets the beef shine. Shredded iceberg, baby spinach, or even a simple coleslaw mix all work really well too. I'd avoid arugula here the bitterness fights with the burger flavors a little too aggressively.
- → Is the burger sauce necessary or can I skip it?
To be real, you could skip it but why would you? The sauce ties every element of the bowl together and gives it that unmistakable cheeseburger diner flavor. If you're in a pinch, even a simple drizzle of yellow mustard and a little mayo does the job beautifully.
High Protein Cheeseburger Bowls Low Carb Meal Prep
High protein cheeseburger bowls packed with seasoned beef, cheese, and fresh toppings a low carb meal prep solution ready in 30 minutes.
Ingredients
Juicy Beef Patty Base
- 1 1/2 lbs 80/20 ground beef
- 1 tsp garlic powder
- 1 tsp onion powder
- 1/2 tsp smoked paprika
- Salt and pepper to taste
Melty Cheese & Savory Toppings
- 4 oz sharp cheddar cheese, shredded
- 4 strips bacon, cooked and crumbled
- 1/2 cup dill pickles, sliced
- 1/4 cup white onion, finely diced
- 1 cup cherry tomatoes, halved
Crisp Greens Bowl
- 4 cups romaine lettuce, chopped
- 1 cup shredded purple cabbage
- 1/2 cup cucumber, diced
Smoky Burger Sauce
- 1/3 cup mayonnaise
- 2 tbsp sugar-free ketchup
- 1 tbsp yellow mustard
- 1 tsp Worcestershire sauce
- 1/2 tsp smoked paprika
Instructions
-
1Cook the BaconCook 4 strips of bacon in a large skillet over medium heat until crispy, about 6-8 minutes. Transfer to a paper towel-lined plate to drain, then crumble into bite-sized pieces. Reserve 1 tbsp of bacon drippings in the pan for extra flavor when cooking the beef.
-
2Mix Burger SauceWhile bacon cooks, whisk together 1/3 cup mayonnaise, 2 tbsp sugar-free ketchup, 1 tbsp yellow mustard, 1 tsp Worcestershire sauce, and 1/2 tsp smoked paprika in a small bowl. Refrigerate your Smoky Burger Sauce until ready to assemble your High Protein Cheeseburger Bowls for Low Carb Meal Prep.
-
3Season the BeefIn a large mixing bowl, combine 1 1/2 lbs 80/20 ground beef with 1 tsp garlic powder, 1 tsp onion powder, 1/2 tsp smoked paprika, and salt and pepper to taste. Mix gently until just combined - overmixing will make the beef tough and dry in your finished bowls.
-
4Brown the BeefHeat the reserved bacon drippings in the skillet over medium-high heat. Add the seasoned ground beef and cook for 8-10 minutes, breaking it into crumbles with a spatula. For the best High Protein Cheeseburger Bowls for Low Carb Meal Prep, cook until deeply browned with no pink remaining, then drain excess fat.
-
5Melt the CheeseReduce heat to low and sprinkle 4 oz shredded sharp cheddar cheese evenly over the cooked ground beef. Cover the skillet with a lid for 1-2 minutes until the cheese is fully melted and gooey. Remove from heat and let rest for 2 minutes before portioning into bowls.
-
6Build the Greens BaseDivide 4 cups chopped romaine lettuce, 1 cup shredded purple cabbage, and 1/2 cup diced cucumber evenly among 4 meal prep containers or bowls. This crisp, colorful base is what makes these High Protein Cheeseburger Bowls for Low Carb Meal Prep a satisfying, nutrient-dense meal without the carbs.
-
7Add Savory ToppingsTop each greens base with an equal portion of the cheesy beef mixture. Then layer on the crumbled bacon, 1/2 cup sliced dill pickles, 1/4 cup finely diced white onion, and 1 cup halved cherry tomatoes, distributing all toppings evenly across all 4 bowls for balanced macros in every serving.
-
8Dress and ServeDrizzle the chilled Smoky Burger Sauce generously over each bowl just before serving. These High Protein Cheeseburger Bowls for Low Carb Meal Prep are ready to enjoy immediately or store sealed in the fridge. Keep the sauce in a separate container if prepping ahead to prevent soggy greens.
Notes
Storage Tip: Store assembled bowls in airtight containers in the refrigerator for up to 4 days. Keep the Smoky Burger Sauce in a separate small container and add it fresh at mealtime to maintain the crunch of the romaine and cabbage.
Substitution Tip: Swap 80/20 ground beef for 90/10 lean ground beef or ground turkey to reduce fat content while keeping the protein high. If using leaner meat, add 1 tbsp olive oil to the skillet to prevent sticking and maintain moisture.
Cheese Tip: For maximum meltiness, shred your sharp cheddar cheese fresh from the block rather than using pre-shredded. Pre-shredded cheese contains anti-caking agents that prevent it from melting as smoothly over the hot beef.
Serving Tip: To turn this into a warm bowl, briefly microwave the beef and cheese portion for 60-90 seconds before placing it over the cold greens. The contrast of warm, cheesy beef over crisp cool lettuce makes every bite feel like a fresh cheeseburger experience.
Equipment
Please check ingredients for potential allergens and consult a health professional if in doubt.
Nutrition Facts
It is important to consider this information as approximate and not to use it as definitive health advice.
Comments
Leave a Comment