


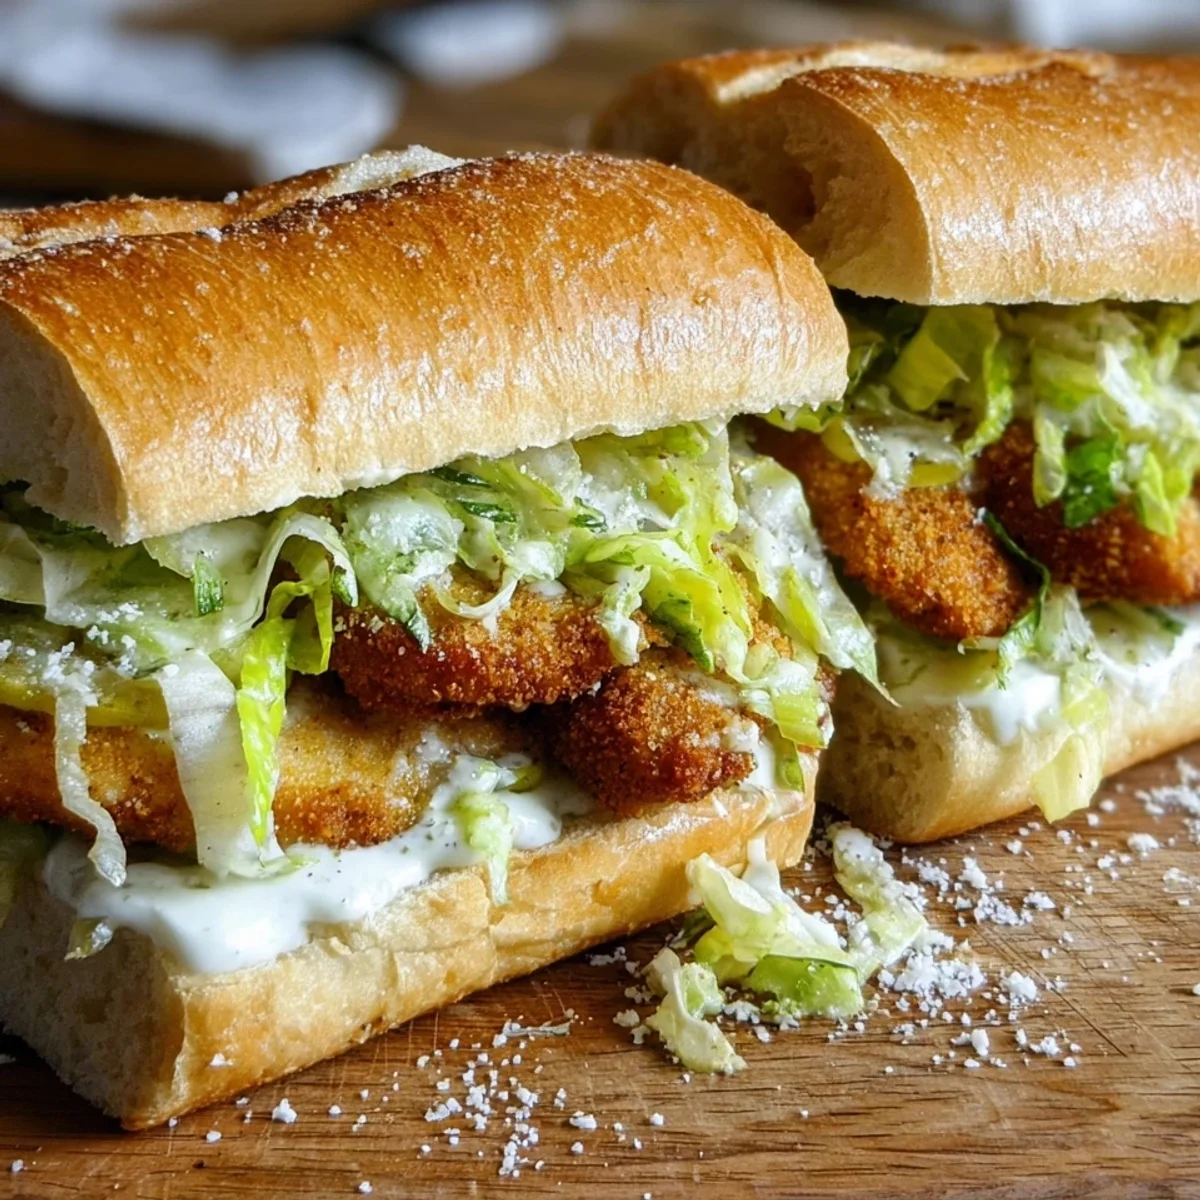
Chicken Caesar sandwiches packed with crispy chicken, romaine, and creamy Caesar dressing. A high-protein meal ready in under 30 minutes.
Okay, so this all started on a random Tuesday when I had leftover Caesar salad stuff in my fridge and zero dinner inspiration. I threw some crispy panko chicken on a toasted ciabatta roll, drizzled that tangy homemade Caesar dressing all over it, and honestly I stood at my kitchen counter eating it in complete silence. That first chicken Caesar sandwich changed my weeknight dinner game forever. No exaggeration.
Oops okay, I have to tell you about the time I forgot to rest the chicken. I was so hungry and impatient, I sliced straight into it the second it came off the pan. Juices everywhere. The whole cutting board was basically a puddle. The sandwich was still good, but soggy bread is not the vibe. Learn from my impatience, friends. Just wait the five minutes. Please.
Chicken Caesar Sandwich: Ingredients You'll Need
- 1 1/2 lbs boneless, skinless chicken breasts (4 cutlets): chicken breast is the MVP of this whole situation. I always ask my butcher to slice them into cutlets, or I do it myself at home thinner pieces cook faster and more evenly, which means no sad raw centers. For a proper chicken Caesar sandwich, you want that cutlet thin enough to get genuinely crispy all the way through. Pound them out if you need to. Your future self will thank you.
- 1/2 cup panko breadcrumbs: Panko is not the same as regular breadcrumbs I cannot stress this enough. Those bigger, flakier Japanese-style crumbs create an airy, shatteringly crispy crust that regular breadcrumbs just cannot replicate. I've tried both. Regular breadcrumbs give you a dense, kind of pasty coating. Panko gives you CRUNCH. It's the difference between a good sandwich and a great one, and honestly, it costs the same. Easy choice.
- 1/4 cup grated Parmesan cheese: Adding Parmesan directly into the panko coating is one of those little tricks that makes people think you went to culinary school. It melts slightly during cooking and creates these tiny savory, nutty pockets throughout the crust. I use freshly grated every time the pre-shredded stuff has anti-caking agents that mess with the texture. Freshly grated Parmesan in the coating is a non-negotiable move in my kitchen.
- 1 tsp smoked paprika: Regular paprika is fine. Smoked paprika is a completely different experience. That deep, woody, almost campfire-like flavor in the coating is what makes people take a bite and go 'wait, what is that?' It adds color too that gorgeous reddish-golden crust you see in the photos. I accidentally grabbed smoked paprika instead of regular the first time I made this, and I didn't expect that happy mistake to become my permanent move.
- 1/3 cup mayonnaise: Mayo is the base of our quick Caesar dressing, and I know some people get weird about it but hear me out. It creates this creamy, rich, emulsified sauce that clings to the chicken and the lettuce perfectly. For this chicken Caesar sandwich dressing, I use full-fat mayo because we're not here to be sad about it. The fat carries all the lemon and Worcestershire flavors beautifully. Don't skip it, don't sub it with Greek yogurt yet just trust the mayo.
- 1 tbsp Worcestershire sauce: This is the secret weapon of the Caesar dressing and honestly one of the most underrated pantry ingredients ever. Worcestershire adds that deep, umami, slightly funky savory note that makes Caesar dressing taste complex and restaurant-worthy. Without it, the dressing tastes flat I learned that the hard way when I ran out mid-recipe and thought I could skip it. I could not skip it. Always have Worcestershire in your pantry. Non-negotiable.
How to Make a Chicken Caesar Sandwich Step by Step
- Step 1: Mix the Caesar Dressing:
- Start here because the dressing actually gets better as it sits for a few minutes. Whisk together the mayonnaise, fresh lemon juice, and Worcestershire sauce in a small bowl until it's completely smooth and creamy. Taste it it should be tangy, savory, and rich all at once. This is the soul of your chicken Caesar sandwich, so don't rush it. I like to add a tiny pinch of black pepper here too. Give it a stir, set it aside, and let those flavors get friendly with each other.
- Step 2: Coat the Chicken:
- Mix the panko breadcrumbs, grated Parmesan, garlic powder, smoked paprika, salt, and pepper together in a shallow dish I use a pie plate because it gives me room to actually press the chicken in properly. Drizzle the olive oil over your chicken cutlets and coat them lightly, then press each one firmly into the panko mixture on both sides. Really press it in. Don't be shy. That good contact between chicken and coating is what gives you that satisfying crunch in every bite of your chicken Caesar sandwich.
- Step 3: Cook the Chicken:
- Heat a large skillet over medium-high heat no extra oil needed since we already coated the chicken. Once the pan is hot, lay the cutlets in carefully. You should hear an immediate, aggressive sizzle. That sound is everything. Cook for about 4-5 minutes per side without moving them around. I know it's tempting to peek and poke, but leaving them alone is what builds that golden, crispy crust. When they release easily from the pan, they're ready to flip. The kitchen smells absolutely incredible at this point.
- Step 4: Rest the Chicken:
- Pull the chicken off the heat and let it rest on a cutting board for at least 5 minutes. I know, I know it's torture when you're hungry. But this step is what keeps the chicken juicy instead of dry. The juices redistribute back into the meat during this rest. Skip this and you'll have a dry chicken Caesar sandwich with a soggy bread situation from all those escaped juices. Been there. It's not fun. Set a timer if you have to. Five minutes. You can do it.
- Step 5: Toast the Ciabatta Rolls:
- While the chicken rests, slice your ciabatta rolls and pop them cut-side down into the same pan you cooked the chicken in. Those leftover golden bits in the pan? Pure flavor. The bread picks all of that up as it toasts. Press down gently with a spatula and let them go for about 1-2 minutes until they're golden and slightly crispy on the edges. Warm, toasty bread makes such a difference cold or soft bread just doesn't hold up to all those toppings the way a properly toasted roll does.
- Step 6: Slice, Assemble, and Add Fresh Toppings:
- Slice the rested chicken on a slight diagonal it looks more impressive and gives you better coverage across the roll. Spread that Caesar dressing generously on both cut sides of the toasted ciabatta. Layer the chicken on the bottom half, then pile on crisp romaine lettuce and a shower of extra Parmesan shavings. Serve your chicken Caesar sandwich immediately while everything is still warm and the bread is still crispy. This is the moment. This is what all those steps were building toward. Take a second to appreciate it before you demolish it.
Honestly, making this on a weeknight feels like a little celebration. The sizzle of the chicken hitting the hot pan, the smell of that smoky paprika crust forming, the sound of the bread toasting it's just a genuinely satisfying cooking experience. Nothing complicated, nothing fussy. Just good technique and good ingredients doing their thing. I never get tired of it.
Storage Tips for Your Chicken Caesar Sandwich
To be real, this sandwich is best eaten immediately like, right off the cutting board. But life happens! Store the cooked chicken cutlets separately from the bread and toppings in an airtight container in the fridge for up to 3 days. Reheat the chicken in a dry skillet over medium heat or in the air fryer at 375°F for about 4 minutes to get the crust crispy again. Do NOT microwave it I made that mistake once and ended up with rubbery, sad chicken. Store the Caesar dressing separately in a small jar for up to 5 days. Assemble fresh each time. The romaine should always go on at the very last second soggy lettuce is a crime I refuse to commit.

Easy Ingredient Swaps for a Chicken Caesar Sandwich
I've played around with this recipe a lot, and here's what actually works. Chicken thighs can sub for breasts they're juicier and more forgiving if you slightly overcook them, though they take a minute or two longer. Gluten-free panko works surprisingly well if you're avoiding gluten same crunch, no issues. For the rolls, a sturdy brioche bun or sourdough roll works great if you can't find ciabatta. No Worcestershire? A tiny splash of soy sauce plus a drop of hot sauce gets you surprisingly close. And if you're out of Parmesan, Pecorino Romano is a perfect swap actually a little sharper and saltier, which I kind of love.
Serving Your Chicken Caesar Sandwich with Style
This sandwich is a full meal on its own, honestly. But if you want to round it out, a simple side of kettle chips or sweet potato fries is my go-to something crunchy to match that crispy chicken energy. A light tomato soup is also a surprisingly perfect pairing on cooler nights. For drinks, a crisp sparkling water with lemon keeps things fresh, or if you're doing a weekend lunch situation, a cold glass of dry white wine is genuinely lovely. I've also served these cut in half at casual get-togethers as a heartier appetizer situation, and they disappear embarrassingly fast. People always ask for the recipe.
The Delicious Backstory of the Chicken Caesar Sandwich
Caesar salad has this wonderfully dramatic origin story it was supposedly invented in 1924 by Caesar Cardini, an Italian-born restaurateur working in Tijuana, Mexico. He threw it together tableside from pantry staples during a busy Fourth of July rush. The chicken Caesar sandwich is a much more modern American evolution of that classic, taking those same bold flavors and making them portable and even more satisfying. I love that food history. A happy accident becoming a global icon. It feels very relatable, honestly. Every time I make a chicken Caesar sandwich, I think about that frantic kitchen moment and feel a little connected to it.
If you make this chicken Caesar sandwich, I genuinely hope it becomes your new weeknight obsession the way it became mine. It's one of those recipes that just makes you happy crispy, tangy, fresh, and satisfying all at once. Drop a comment below and tell me how it went! Did you try any fun substitutions? I want to hear everything. Happy cooking, friends.

Frequently Asked Questions about Chicken Caesar Sandwiches
- → Can I make the Caesar dressing ahead of time?
Yes! The dressing actually tastes even better after sitting in the fridge for a few hours. Make it up to 3 days ahead and store it in a sealed jar. Just give it a good stir before using it might separate slightly but comes right back together.
- → Can I bake the chicken instead of pan-frying it?
You can! Bake at 425°F on a wire rack over a baking sheet for about 18-20 minutes. The crust won't be quite as deeply golden as pan-fried, but it still gets nicely crispy. Spray the coated chicken lightly with cooking spray before baking for better color.
- → Is a chicken Caesar sandwich actually high in protein?
It really is! Chicken breast is one of the leanest, highest-protein meats out there. Each serving of this recipe packs roughly 40-45 grams of protein depending on your roll size. Add the Parmesan and you've got a seriously solid high-protein meal that keeps you full for hours.
- → What's the best bread for this sandwich?
Ciabatta is my top pick because it's sturdy enough to hold all the toppings without getting soggy, and it toasts beautifully. Sourdough rolls or brioche buns are great runners-up. Avoid anything too soft or fluffy it just collapses under the weight of the chicken and dressing.
- → Can I use store-bought Caesar dressing instead of homemade?
Oops I mean, technically yes, but I'd really encourage you to try the homemade version at least once. It takes under 5 minutes and the flavor difference is pretty significant. Store-bought works in a pinch though! Just go for a good quality brand and taste it before adding extra salt.
Chicken Caesar Sandwiches: Crispy & High-Protein
Chicken Caesar sandwiches packed with crispy chicken, romaine, and creamy Caesar dressing. A high-protein meal ready in under 30 minutes.
Ingredients
Crispy Herb-Seasoned Chicken
- 1 1/2 lbs boneless, skinless chicken breasts (4 cutlets)
- 1/2 cup panko breadcrumbs
- 1/4 cup grated Parmesan cheese
- 1 tsp garlic powder
- 1 tsp smoked paprika
- 2 tbsp olive oil
- Salt and pepper to taste
Creamy Caesar Dressing
- 1/3 cup mayonnaise
- 2 tbsp fresh lemon juice
- 1 tbsp Worcestershire sauce
- 2 tsp Dijon mustard
- 2 cloves garlic, minced
- 1/4 cup grated Parmesan cheese
Toasted Sandwich Base
- 4 ciabatta rolls, halved
- 2 tbsp unsalted butter, softened
Fresh Crunch & Finish
- 2 cups romaine lettuce, chopped
- 1/2 cup shaved Parmesan cheese
- 1/4 cup croutons, lightly crushed
Instructions
-
1Mix the Caesar DressingIn a small bowl, whisk together 1/3 cup mayonnaise, 2 tbsp fresh lemon juice, 1 tbsp Worcestershire sauce, 2 tsp Dijon mustard, 2 cloves minced garlic, and 1/4 cup grated Parmesan cheese until smooth and creamy. Refrigerate until ready to use.
-
2Coat the ChickenOn a shallow plate, combine 1/2 cup panko breadcrumbs, 1/4 cup grated Parmesan cheese, 1 tsp garlic powder, 1 tsp smoked paprika, salt, and pepper. Press each of the 4 chicken cutlets firmly into the mixture, coating both sides evenly for maximum crispiness.
-
3Cook the ChickenHeat 2 tbsp olive oil in a large skillet over medium-high heat. Cook the breaded chicken cutlets for 5–6 minutes per side until golden brown and the internal temperature reaches 165°F. For the best Chicken Caesar Sandwiches: Crispy & High-Protein Meal, avoid overcrowding the pan.
-
4Rest the ChickenTransfer the cooked cutlets to a cutting board and let them rest for 3–5 minutes. This step is essential for your Chicken Caesar Sandwiches: Crispy & High-Protein Meal, as resting locks in the juices and keeps the breading perfectly crisp before slicing.
-
5Toast the Ciabatta RollsSpread 2 tbsp softened unsalted butter evenly across the cut sides of all 4 ciabatta rolls. Place them butter-side down in the same skillet over medium heat for 1–2 minutes until golden and lightly toasted. This adds a rich, crunchy base to every sandwich.
-
6Slice and AssembleSlice each rested chicken cutlet on a diagonal. Spread a generous layer of Caesar dressing on both halves of each toasted ciabatta roll. Layer the sliced chicken onto the bottom halves, building the foundation of your Chicken Caesar Sandwiches: Crispy & High-Protein Meal.
-
7Add Fresh ToppingsTop each sandwich with 1/2 cup chopped romaine lettuce, a handful of 1/2 cup shaved Parmesan cheese divided among the four rolls, and a sprinkle of 1/4 cup lightly crushed croutons for satisfying crunch. These finishing touches complete your Chicken Caesar Sandwiches: Crispy & High-Protein Meal perfectly.
-
8Serve ImmediatelyPress the top halves of the ciabatta rolls down gently and serve right away. For a complete meal, pair with a light side salad or sweet potato fries. The crispy chicken and creamy Caesar dressing are best enjoyed fresh while the rolls are still warm.
Notes
Storage Tip: Store leftover chicken cutlets and Caesar dressing separately in airtight containers in the refrigerator for up to 3 days. Assemble sandwiches fresh to prevent the rolls from becoming soggy.
Substitution Tip: Swap ciabatta rolls for brioche buns or whole wheat hoagie rolls if preferred. For a lighter version, use Greek yogurt in place of mayonnaise in the Caesar dressing without sacrificing creaminess.
Cooking Tip: Pound the chicken cutlets to an even 1/2-inch thickness before breading to ensure they cook evenly and stay juicy throughout. A meat mallet or rolling pin works perfectly for this.
Serving Tip: For a crowd-pleasing presentation, serve the Caesar dressing on the side as a dipping sauce alongside the assembled sandwiches. This keeps the bread crisp longer and lets guests control their portions.
Equipment
Please check ingredients for potential allergens and consult a health professional if in doubt.
Nutrition Facts
It is important to consider this information as approximate and not to use it as definitive health advice.
Comments
Leave a Comment